
PRESENTATION
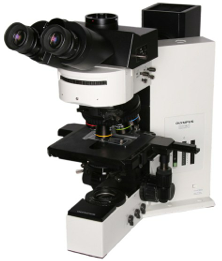
Olympus BX60 manual fluorescence microscope with mercury fluorescence illuminator, and Nomarski/DIC Prism for Transmited Light
Room: 2.1.15
IP: 10.101.134.70 (why?)
Check “What are the costs” at the Users section
| Pos | Mag | NA | IM | Corr. | WD (mm) | Glass (mm) | Color Code | Pixel Size w/ Ham. OrcaR2 camera (um/pix) | Obs |
|---|---|---|---|---|---|---|---|---|---|
| 10x | 0.40 | Air | UPlanApo | 3.10 | - | 0.64 | - | ||
| 20x | 0.75 | Air | UPlanSApo | 0.65 | - | 0.322 | - | ||
| 40x | 1.00 | Oil | UPlanApo | 0.12 | 0.16 | Open iris for fluorescence | |||
| 100x | 1.35 | Oil | PlanC N | 0.13 | - | 0.0645 | |||
Pos Position
Mag Magnification
NA Numerical Aperture
IM Immersion Medium
Corr. Correction Type
WD Working Distance
Glass Coverglass
Obs Observations
40× use with/out coverglass; 100× use with coverglass
| Position | Excitation (nm) | Emission (nm) | Fluorophores | Model |
|---|---|---|---|---|
| U-MWU2 | BP 330-385 | LP >420 | DAPI, hoechst | - |
| U-MNIB | BP 470-490 | LP >515 | GFP, Alexa488, cy2, FITC | - |
| U-MNG | BP 530-550 | LP >590 | RFP, YFP, Alexa546, Alexa568, cy3, TRITC | - |
| U-MSWB | BP 420-480 | LP >515 | only w/ cromossina | - |

Transmitted light
Halogen lamp
Fluorescence
Olympus U-RFL-T Mercury lamp
Hamamatsu Orca R2 cooled monochromatic CCD camera (1.3 Mpixel), 6.45×6.45 um/pixel
ACCESSORIES
BASIC PROCEDURE FOR MULTICHANNEL GRAYSCALE IMAGES
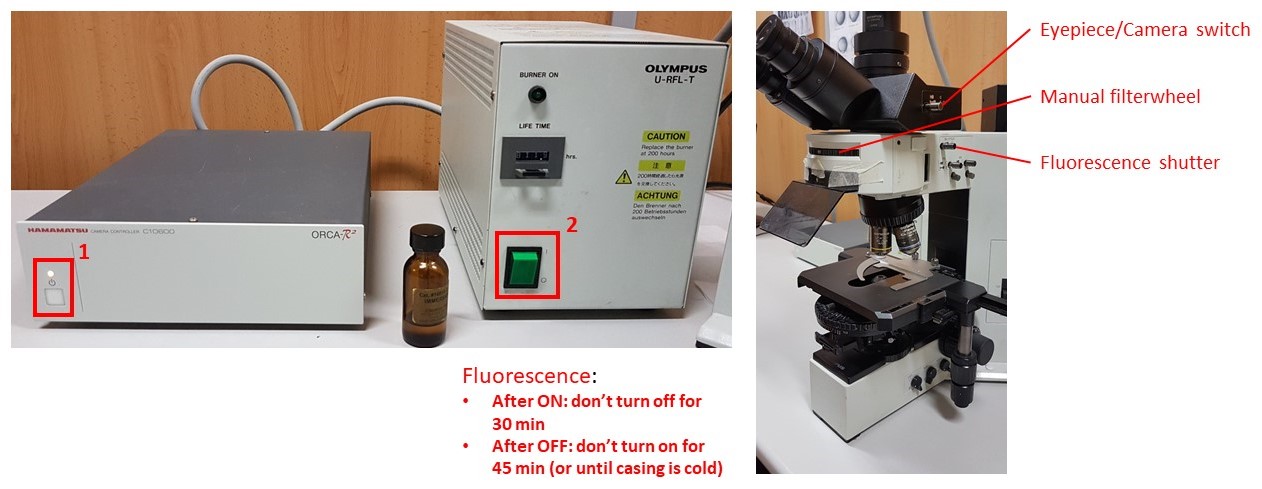
- Turn on Hamamatsu Camera control box (button 1).
- Turn on fluorescence source box (button 2).
- Do not switch it off for 30 minutes after switching on
- DO NOT switch on if the metal casing is still warm, i.e., it was switched off less than 45 minutes before.
- Push the Eyepiece/Camera switch pole all the way in, push in the Fluorescence shutter, and select desired filtercube with the manual filterwheel. Select desired objective and bring your sample into focus.
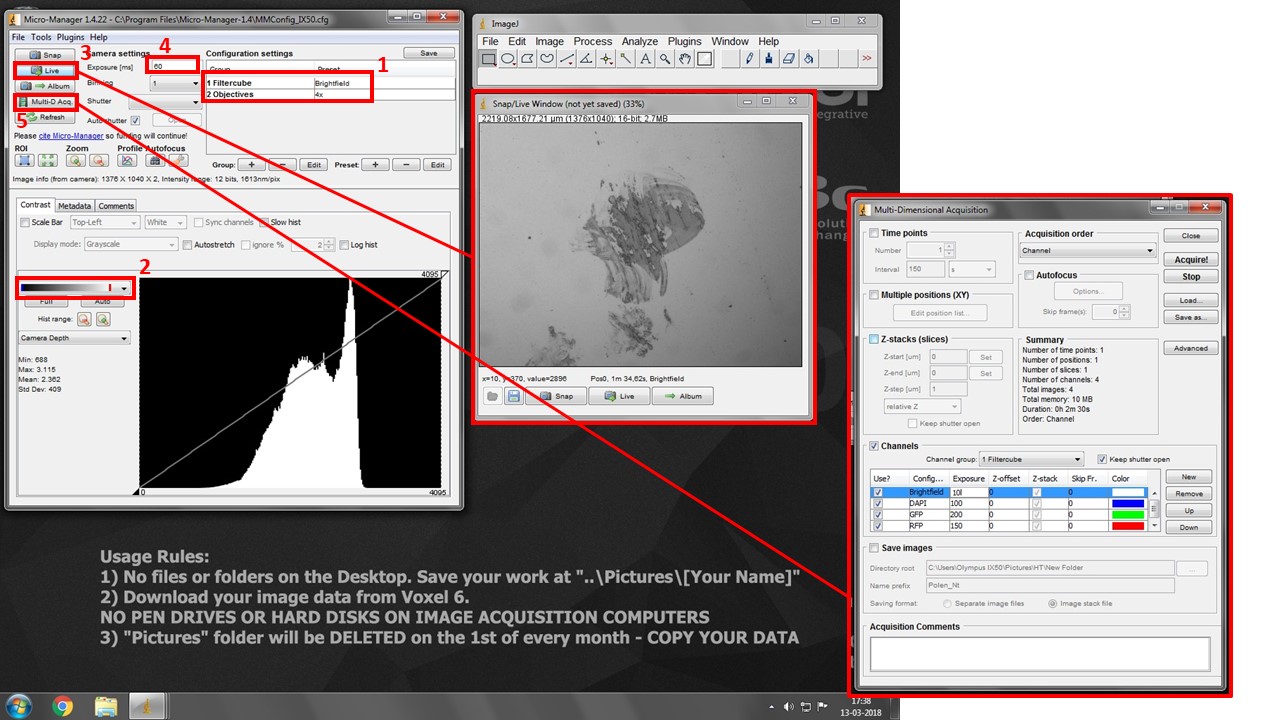
- Turn on the acquisition PC (4) and start uManager program

- Push the Eyepiece/Camera switch pole all the way out to camera position.
- Select both desired filtercube and objective in the drop-down boxes in box (1). THESE ARE SOFTWARE SETTINGS AND DO NOT CONTROL THE MICROSCOPE. But they do allow you to set different exposures for each channel for multidimensional acquisition, and snap spatially calibrated images for each objective.
- Pick the second lookup table in box (2). It will show black pixels as BLUE and white pixels as RED. This will help you with exposure settings.
- Press “Live” button (3) to see your image.
- Increase exposure (4) in each filter combination (change to the adequate “Filtercube” in (1) each time) until you see your signal, but very little to no saturation (white/red pixels).
- When you have picked correct exposure settings for all your channels, press Multi-D. Acq. Button (5) and check “Channels”. Add desired channels, and pick a suitable lookup table color for each.
- Press “Acquire” to start multi-dimensional acquisition. Turn manual filterwheel as requested by the software, and minimize table vibrations as the software is acquiring images.
- Click on the little “settings gear” icon at the bottom right of the acquired image and click “Send to ImageJ”. It will create a proper multichannel image for saving.
- Go to ImageJ File > Save As > save as TIFF. You will be saving a composite image with “x” 12/16-bit greyscale channels. Save it on your image folder. Copy your images from Voxel 6.
- Turn off system in reverse order.
LINKS / USER MANUALS
PEOPLE RESPONSIBLE FOR THE EQUIPMENT
 |
 |
|
Telmo Nunes FCUL Microscopy technician mevarrimento@fc.ul.pt Room 2.1.15 |
Luís Marques
FCUL Microscopy technician lfmarques@fc.ul.pt Room 8.1.79 / 2.1.15 |